I remember the exact moment I realized I could ditch the harsh scrubbing for my oven racks. It was during a frantic move-out cleaning session, my arms aching from stubborn grease that refused to come off. After wasting precious time and energy, I stumbled upon a simple trick that changed everything—no more elbow grease, just effortless cleanup. If you’ve ever stared helplessly at grimy oven racks, knowing you’re bound to spend hours scrubbing, you’re not alone. Many homeowners and renters face this tedious chore, often devastating their move-out day timeline.
The Frustration of Scrubbing Oven Racks
Cleaning oven racks has always been a dreaded task for me. The built-up grease, charred bits, and stubborn grime seem impossible to remove without endless scrubbing. I used every chemical, scrub brush, and trick in the book—yet, pictures of shiny, spotless racks stayed just out of reach. It wasn’t until I nearly gave up that I discovered a ‘magic’ method that requires zero scrubbing and yields astonishing results. This technique not only saved my time but also left my oven looking as good as new—without the harsh chemicals or back-breaking effort. Curious? Keep reading to learn how you can make this moving nightmare a breeze.
Is the Move-Out Oven Rack Cleaning Hack Overhyped?
Early on, I made the mistake of rushing into what I thought was ‘simple cleaning,’ using abrasive pads and chemical sprays that only seemed to make matters worse. My mistake was neglecting to research the real reason grime sticks so stubbornly—something I learned after some trial and error. Turns out, many traditional cleaning methods overlook the power of natural solutions and strategic soaking. If you’ve ever wondered whether all these so-called tricks are just hype, you’re in the right place. I’ll walk you through a tried-and-true method that truly works—trust me, it’s a game-changer, especially for those moving out or trying to reclaim their kitchen’s shine. For more cleaning secrets that can help with your entire house, visit [effective house cleaning secrets from cleaning experts](https://spotlesscarpetz.com/effective-house-cleaning-secrets-from-cleaning-experts). Now, let’s get started with how this trick works and why it’s so effective.
Soak to Break Down Grease
Begin by removing the oven racks and placing them in a large tub or sink filled with hot water and a generous amount of baking soda. As I did during a messy move-out day, immerse the racks completely, ensuring all greasy surfaces are submerged. Let them soak for at least 4 hours or overnight. The baking soda reacts with the grime, softening it for easier removal, much like a natural cleaner that penetrates deep into stubborn stains.
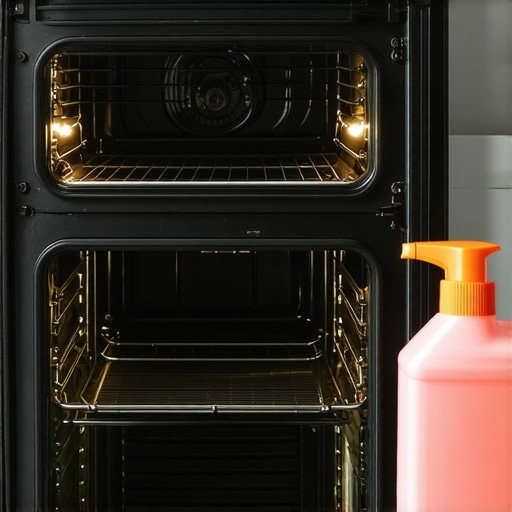
Apply Natural Degreaser
After soaking, drain the water and spray the racks with a mixture of equal parts white vinegar and water. This natural solution helps dissolve remaining grease, making scrubbing unnecessary. I remember spraying this mixture on a particularly greasy rack, and within minutes, the grime started loosening without any elbow grease. Use a soft scrub brush or a non-abrasive sponge to gently scrub away any residual dirt—think of it as guiding the grime off rather than battling it head-on.
Rinse and Dry Thoroughly
Rinse the racks with warm water to remove all residues of baking soda and vinegar. Dry them completely with a microfiber cloth or let them air dry. This step prevents water spots and ensures they’re ready to be replaced. Additionally, wiping them down with a clean cloth avoids streaks and leaves a shiny finish—akin to giving your racks a quick skincare routine for that refreshed look.
Deep Clean the Oven Interior
While the racks are soaking, turn your attention inside the oven. Use a homemade spray of baking soda and water applied with a sponge to cover baked-on grime. Let it sit for about 15 minutes, then wipe with a damp cloth. For stubborn spots, a soft nylon scraper can gently lift grime without damaging surfaces. Think of this as removing the last stubborn bits vying to ruin the perfect shine of your oven.
Sanitize and Freshen Up
Finish by sanitizing the cleaned surfaces to ensure all germs are eradicated—especially important during move-out cleaning. A solution of alcohol-based disinfectant or a plant-based sanitizer from [effective house cleaning secrets from cleaning experts](https://spotlesscarpetz.com/effective-house-cleaning-secrets-from-cleaning-experts) ensures your oven is safe and ready for its next chapter. Regular sanitizing keeps your kitchen healthier and extends the lifespan of your appliances.
Optional: Refresh and Protect
For an extra touch, apply a thin layer of olive oil or a dedicated appliance protectant to cast a subtle shine and ward off future grime buildup. Keep your oven racks looking brand new with this simple maintenance step—it’s like giving them a protective coat after their deep cleaning spa day.
Many people believe that sticking to generic cleaning products and routines guarantees a spotless home. However, as an experienced cleaner, I can tell you that this notion often leads to overlooked dirt spots and ineffective sanitation. For instance, relying solely on standard disinfectants without understanding the nuances of different surfaces can do more harm than good, potentially damaging delicate fabrics or leaving bacteria behind. A prevalent myth is that scrubbing harder yields cleaner results, but in reality, vigorous scrubbing can wear out fabrics and surfaces faster, and even push dirt deeper into fibers. Instead, adopting targeted techniques—like proper upholstery cleaning methods outlined in [this detailed guide](https://spotlesscarpetz.com/upholstery-cleaning-tips-for-a-fresh-home-revival)—can make all the difference.
One hidden trap many fall into involves misjudging the effectiveness of natural disinfectants. While vinegar and baking soda are popular eco-friendly options, they are not capable of killing all germs, especially on high-touch surfaces. As highlighted in [expert research](https://spotlesscarpetz.com/effective-house-cleaning-secrets-from-cleaning-experts), proper sanitization requires the right combination of chemicals and adequate contact time, especially during flu season or pandemic concerns. Overlooking this nuance can leave your home vulnerable to bacteria and viruses.
Now, what about move-out cleaning? Some believe that a quick once-over suffices, but landlords look for meticulous detail—missed spots can jeopardize your deposit. According to [move-out cleaning strategies](https://spotlesscarpetz.com/move-out-cleaning-strategies-to-secure-your-deposit), focusing on often-neglected areas like HVAC filters or hidden corners behind appliances can prevent deposit deductions and ensure a smooth transition.
In terms of upholstery care, many assume that regular vacuuming is enough. However, fabrics like velvet or microfiber require specialized cleaning methods to preserve their texture and longevity. For advanced tips, check out [these upholstery cleaning recommendations](https://spotlesscarpetz.com/upholstery-cleaning-tips-for-a-fresh-home-revival). Proper maintenance extends beyond surface dirt removal and includes addressing embedded grime and odors that can linger beneath the surface.
Finally, thorough sanitizing is often mistaken for simply spraying disinfectant. Real sanitization involves comprehensive cleaning, contact time, and understanding surface-specific needs. For delicate items or natural fabrics, aggressive chemicals can cause damage or discoloration, so knowing when and how to sanitize safely is crucial. You can find more insights into these nuances at [effective sanitizing hacks](https://spotlesscarpetz.com/sanitizing-hacks-for-safe-house-transitions).
Are you falling prey to any of these misconceptions? Understanding the subtle differences and advanced techniques can elevate your home cleaning routine from basic to expert level. If you want tailored advice or help with stubborn spots, don’t hesitate to reach out through [our contact page](https://spotlesscarpetz.com/contact-us). Remember, thoughtful cleaning is an investment in your health, home value, and peace of mind. Share your experiences or questions below—I’d love to hear if you’ve ever fallen into these traps or discovered new tips on your journey to a cleaner home.Maintaining a clean home over the long term requires a combination of the right tools and consistent routines. Personally, I rely on high-quality equipment that not only delivers exceptional results but also stands the test of time. One staple in my arsenal is a **microfiber cleaning cloth**, which is gentle on surfaces yet effective at trapping dust and grime without the need for harsh chemicals. Unlike traditional sponges or paper towels, microfiber can be washed and reused countless times, making it both eco-friendly and economical; discover more about why microfiber cloths outperform paper towels at [this detailed guide](https://spotlesscarpetz.com/why-microfiber-cloths-stop-working-and-how-to-save-them).
How do I keep my tools working like new over time?
To ensure longevity, I always clean my tools after each use. For example, after vacuuming, I remove and clean the filter with compressed air and a soft brush, which prevents dust buildup and maintains suction power. Regularly checking and replacing worn-out brushes or filters keeps equipment performing optimally and reduces strain during cleaning sessions. Investing in **quality brands** is also essential; I swear by **Dyson**, whose vacuums are durable and come with excellent filters that trap tiny allergens—an important consider for long-term home health. Additionally, always follow the manufacturer’s maintenance instructions; neglecting simple upkeep like replacing or cleaning filters can significantly shorten your tools’ lifespan.
Advancements in technology suggest that future cleaning tools will become increasingly smart and automated. Imagine robotic vacuums that map your entire home and adjust cleaning modes based on surface types—saving you time and effort. Staying updated with these innovations can help you transition to more efficient home maintenance routines. Keep an eye on new releases from trusted brands like iRobot or Roborock—they’re leading the charge in smart cleaning tech.
Proper maintenance extends beyond equipment. It’s equally important to develop routines that promote their longevity. For example, regularly inspecting upholstery tools for tears or clogs and using specialized cleaning solutions prevents damage and keeps them performing effectively. For delicate fabrics, I recommend using **specialized upholstery cleaners**, like those outlined in [this guide](https://spotlesscarpetz.com/upholstery-cleaning-tips-for-a-fresh-home-revival), to avoid equipment strain and fabric damage.
What’s the best way to keep your tools in top shape? Create a maintenance schedule tailored to your appliances, like wiping vacuum filters monthly and lubricating moving parts annually. This proactive approach reduces breakdowns and ensures consistent performance. Remember, investing in quality tools and proper upkeep pays off by making house cleaning less of a chore and more of a manageable routine. To optimize your maintenance, I encourage you to try cleaning your vacuum filter with compressed air this weekend—you’ll notice increased suction almost immediately. If you’re eager to learn more about advanced cleaning tools or need personalized recommendations, visit [our contact page](https://spotlesscarpetz.com/contact-us) for expert guidance.
Having learned the hard way that oven rack cleaning doesn’t have to be a grueling chore, I now embrace a simple, effective routine that saves me time and preserves the integrity of my appliances. The key lies in understanding that patience and natural solutions outperform aggressive scrubbing and harsh chemicals every time. By soaking your racks in a baking soda solution, you soften built-up grime; then, a vinegar spray dissolves residual grease, allowing for gentle wiping instead of vigorous scrubbing. Remember, a thorough rinse, proper drying, and occasional protective treatments keep your oven looking brand new—just like a professional deep clean. This approach not only makes move-out cleaning more manageable but also extends the lifespan of your appliances, ensuring they serve you well long-term. Embrace these techniques, and you’ll find cleaning becomes a satisfying part of your home upkeep, not a dreaded task.