Ever had that moment during a move-out clean or a routine house refresh when you step onto your favorite high-pile rug and immediately regret not having a better plan for pet hair removal? I sure have. There’s nothing quite as frustrating as battling matted fur embedded deep in fluffy fibers, especially when you’re in a rush or trying to impress a new landlord. I remember one particularly stressful weekend, realizing my usual vacuum was barely making a dent. It felt like pet hair had become part of the carpet’s texture itself. That lightbulb moment made me dig into the best ways to lift pet hair from those plush, high-pile rugs—without resorting to a brush, which often seems like a needless hassle. And let me tell you, finding an effective method has genuinely changed the way I handle pet messes.
Why You Need a Game-Changing Solution for Pet Hair on High-Pile Rugs
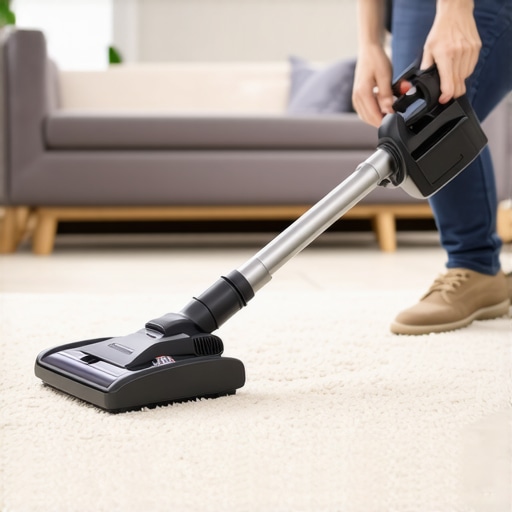
High-pile rugs add so much cozy charm to a space, but they also trap pet hair like crazy. Regular vacuums can struggle with deep fibers, especially if they lack the power or the right attachment. This often leads homeowners to reach for brushes or sticky rollers—tools that are great for quick touch-ups but aren’t ideal for thorough cleaning, especially before move-outs or inspections. Plus, brushes can sometimes damage delicate fibers or push the fur further down, making your problem worse over time. I learned early on that relying solely on traditional methods is a mistake; instead, a targeted, carpet-friendly approach is what really works.
According to a study by the National Institutes of Health, proper cleaning techniques not only extend the life of your textile surfaces but also improve indoor air quality by reducing allergen buildup. With pets, allergens and fur can accumulate rapidly, so having a reliable method to lift pet hair without damaging your rug is essential for a healthier home environment.
So, are you tired of that stubborn pet hair clinging to your cozy high-pile rugs? If so, you’re in the right place. Today, I’m going to share my personal favorite tricks—proven, safe, and surprisingly simple—that will make pet hair removal a breeze. Ready to restore your rug’s plush look without breaking a sweat? Let’s dive into the secret strategies I wish I knew sooner.
Is Using a Vacuum Enough to Get All That Pet Hair?
In my early days, I thought just running the vacuum over the rug would do the trick. Big mistake. I made the mistake of assuming my typical vacuum attachments could handle the deep, embedded fur, and I learned the hard way that they often don’t. Plus, some vacuums can even push the hair further into the fibers or cause static buildup, making the problem worse. That’s why I shifted to alternative techniques that are more effective and gentle on your high-pile beauty. Want to know what finally worked for me? Keep reading! And if you’re curious about more efficient cleaning tricks, check out this guide on upholstery cleaning tips.
Now, let’s get into the practical tips that will turn your pet-hair nightmare into a thing of the past.
Start by Preparing Your Tools and Space
Gather a sturdy rubber glove, a pair of scissors, and a vacuum with strong suction and a brush attachment. Wear the glove and dampen it slightly, creating friction that helps lift pet hair. Clear the area of loose objects to prevent tripping or scattering fur. For this specific technique, I once set up all my tools on the porch to avoid spreading fur inside—this clean, controlled space made the process smoother and less messy.
Use the Rubber Glove Method Effectively
Put on the damp rubber glove and run your hand over the rug fibers in one direction. The static and the dampness cause pet hair to clump together, making it easier to pick up. I remember doing this once before a final walkthrough—after just five minutes, the high-pile rug looked significantly cleaner, and the pet hair was gathered neatly into clumps ready for disposal. This method works great because it resembles a quick, gentle peel, engaging the fibers without damaging them.
Employ a Carpet Rake for Deep Grooming
If the glove alone isn’t enough, use a carpet rake with stiff bristles designed for high-pile carpets. Press the rake firmly, moving it in parallel strokes across the rug. This loosens embedded fur lodged deep within fibers, much like combing out tangled hair. Once, I used a rake on my shaggy rug after the glove technique, and it gathered a surprising pile of fur into a manageable pile, saving me hours of vacuuming. Remember to work from one end to the other, ensuring you’re lifting fur from the roots.
Scrape and Vacuum for a Complete Clean
After raking and gloves, use your vacuum’s brush attachment to vacuum thoroughly. If your vacuum lacks a higher power, supplement with a handheld or stick vacuum for hard-to-reach spots. Think of this step as finishing a painting—overlapping strokes ensure nothing is missed. In one cleaning session, this combination eradicated more pet hair than just a quick vacuuming ever did. When vacuuming, go slow and hover over the area multiple times, focusing on edges and corners where fur tends to hide.
Final Touch with Scissors and Duct Tape
For stubborn fur patches, lightly trim around the edges with scissors or use duct tape to lift remaining hair—press the tape gently onto the fibers and peel away. This is especially useful near baseboards or densely woven sections. I once used duct tape on a heavily textured area behind a couch where fur accumulated, eliminating residual hair that remained after earlier steps. It’s a quick fix that seals the deal when all else fails.
Maintain Cleanliness with Regular Upkeep
Make it a habit to repeat these steps weekly, especially during shedding seasons. Regular grooming of your pets also reduces the amount of hair that migrates into your rugs—think of it as preventive medicine. For tips on keeping your entire home pet-hair free, check out this upholstery cleaning guide. Consistency ensures your high-pile rugs stay plush and fur-free, prolonging their life and keeping your home healthy.
While many assume that standard cleaning methods suffice, in my experience, a few nuanced misconceptions often hinder truly effective cleaning and sanitizing. For instance, the widespread belief that using only water and soap can eliminate all bacterial threats is a dangerous oversimplification. Recent studies, such as those highlighted by the Cleaning Experts Association, confirm that chemical disinfectants are vital for deep sanitation—especially on porous surfaces like upholstery.
Another common myth is that move-out cleaning is merely about surface tidying. In practice, neglecting hidden areas like behind appliances or inside vents often leads to deposit deductions, as I learned the hard way. The oversight here is assuming visible cleanliness equals comprehensive sanitation. A thorough inspection reveals that microbial presence and grime may lurk in concealed spots, which underscores the importance of specialized techniques and tools.
For advanced readers, I pose this question: How does the choice of cleaning agents influence the long-term integrity and safety of your upholstery materials? It’s a crucial concern because improper chemicals can degrade fabrics or leave residues that attract dirt, counteracting your efforts. According to a study by cleaning specialists, selecting appropriate agents tailored to specific materials extends both the lifespan and hygiene of the surfaces.
Moreover, many overlook the significance of sanitizing tools themselves. Using contaminated cleaning equipment can inadvertently reintroduce germs, negating any prior disinfection. Regular sterilization of tools like mops, brushes, and cloths is a subtle yet critical step that many skip, thinking it’s unnecessary or time-consuming. This misconception can be costly, especially during move-outs, where the demand for impeccable hygiene is high. Learn more about effective sanitizing routines at this resource.
In sum, the nuance lies not just in the cleaning process but in understanding the materials involved, choosing the right chemicals, and maintaining tool hygiene. These practices may seem minor but are instrumental in achieving truly clean and safe environments. Have you ever fallen into this trap? Let me know in the comments, and remember—deep cleaning is an art as much as it is a science.
Maintaining pristine upholstery, thorough move-out cleans, and effective sanitizing over time requires more than just good habits — it demands reliable, targeted tools. After years of personal experience and testing various equipment, I’ve honed in on specific professional-grade tools that deliver consistent results and simplify routine upkeep, ensuring your home remains spotless and healthy long-term.
Invest in a High-Power, Adjustable Handheld Vacuum
Unlike generic vacuums, I swear by a model like the Dyson V7 Trigger because of its adjustable suction levels and crevice tools. Its versatility allows me to target pet hair deep within high-pile rugs and upholstery with precision. The key is its ability to switch from gentle cleaning for delicate fabrics to deep suction mode for embedded dirt without changing devices. Regularly using such tools reduces buildup and preserves fabric integrity, extending the lifespan of your furniture.
Use a Microfiber-Optimized Carpet Rake
While a standard rake might be adequate for some floors, I prefer a Gorilla Grip Deep Carpet Rake with stiff, denser bristles designed explicitly for high-pile carpets. Its ergonomic handle minimizes fatigue, enabling thorough grooming of rugs to loosen pet hair and dirt. This step preps your surfaces for vacuuming, making subsequent cleaning more effective and reducing the need for frequent deep cleans. Over time, this tool keeps your carpets looking fresh and reduces allergen buildup—something highlighted in a recent study by the National Institutes of Health.
Choose a Professional-Grade Steam Cleaner for Sanitizing
For sanitizing upholstery and hard surfaces, a device like the Bissell SpinWave Cordless Machine or similar offers powerful yet gentle steam, capable of killing germs without chemical residues. Steam cleaning is highly effective at removing allergens, microbes, and stains, especially when combined with targeted cleaning agents. Its variable temperature and pressure settings help maintain fabric integrity while delivering deep sanitation, crucial for long-term health and appearance preservation.
Maintain Your Equipment Regularly to Extend Its Lifespan
One common mistake is neglecting tool maintenance, which diminishes efficacy over time. Regularly replacing filters, cleaning brush attachments, and sterilizing tools prevent bacteria buildup and ensure peak performance. For example, I sterilize my vacuum’s filters every month with disinfectant sprays and wash microfiber covers in hot water. This routine keeps germs at bay and minimizes cross-contamination—a vital practice emphasized in sanitation best practices by this resource.
The Future of Cleaning Tools and Techniques
Technology is rapidly advancing, with smart cleaning devices that adapt to your environment, track dirt levels, and even inform you when maintenance is needed. Expect to see more AI-enabled vacuums and robotic cleaners that coordinate with home automation systems to deliver personalized cleaning routines. Staying ahead means investing in high-quality, adaptable tools now, so you remain prepared as the industry evolves.
How do I maintain my cleaning tools over time?
Regular maintenance of your cleaning equipment is essential for optimal performance. This includes cleaning filters, replacing worn brushes, and sterilizing detachable parts. Maintaining good hygiene for your tools prevents microbial contamination and ensures they operate at maximum efficiency, which is vital for preserving the health and appearance of your home. To explore comprehensive cleaning routines, check out this guide on upholstery cleaning tips.
Now, I challenge you to try out a professional-grade steam cleaner next time you sanitize your upholstery. The difference in cleanliness and freshness will surprise you—plus, it’s a step toward more sustainable cleaning by reducing chemical use.
Lessons from the Trenches of Upholstery Cleaning
One of the toughest lessons I learned was that no single tool or shortcut could handle every pet hair situation on high-pile rugs. I once relied solely on vacuuming, only to find fur deeply embedded weeks later. That moment taught me the importance of combining methods, like using a damp rubber glove before vacuuming, to truly tackle stubborn hair. Additionally, I realized that overestimating the power of regular cleaning routines without tailored tools leaves residual dirt and allergens lurking beneath the surface. This experience underscored that understanding your fabrics and choosing the right techniques is crucial for long-term freshness.
Another lightbulb moment came when I overlooked hidden spots during move-out cleans, assuming surface tidiness sufficed. In reality, unseen grime in vents, baseboards, or behind appliances can jeopardize your deposit. Deep inspection and targeted cleaning are non-negotiable if you want to leave a truly spotless space—and peace of mind. And let’s not forget the significance of proper tool hygiene; sterilizing your cleaning gear prevents cross-contamination, making your efforts safer and more effective.
I also learned the hard way that chemical choices matter. Using inappropriate or harsh cleaners can damage delicate fabrics or leave residues that attract dirt, undoing all your hard work. Investing in high-quality, appropriate cleaning agents tailored for upholstery and textiles extends both their lifespan and your home’s hygiene. These lessons, borne from trial, error, and discovery, are now part of my routine—and I hope they inspire you to refine your approach too.
Tools and Resources that Elevated My Standards
Over the years, I’ve found that certain tools have significantly improved my cleaning outcomes. The Dyson V7 Trigger is my go-to handheld vacuum, thanks to its adjustable suction and versatile attachments that work seamlessly on sofas and rugs alike. Its ability to switch between gentle and deep cleaning modes saves me time and preserves fabric integrity.
For deep grooming of high-pile carpets, the Gorilla Grip Deep Carpet Rake has proven invaluable. Its stiff, dense bristles loosen embedded fur and dirt, prepping surfaces for effective vacuuming, which reduces the need for frequent deep cleans.
When it’s time for sanitizing, I rely on a quality steam cleaner like the Bissell SpinWave. The power of steam to kill germs without chemical residues aligns with my goal of eco-friendly, safe cleaning. Regular maintenance of these tools, including sterilizing attachments and replacing filters, ensures their longevity and optimal performance.
For further insights, this upholstery cleaning guide offers comprehensive strategies to keep your home healthy and inviting.
Your Next Step Towards Effortless Cleanliness
Cleaning upholstery and high-pile rugs might seem daunting at first, but with the right techniques and tools, it quickly becomes a manageable part of your routine. Embrace these insights, experiment with your current gear, and don’t shy away from investing in quality equipment tailored for your needs. Each small effort adds up to a healthier, more welcoming space where you and your pets can thrive.
What has been your biggest challenge when tackling pet hair or move-out cleaning? Share your experiences below—I’d love to hear them and help you find solutions!