I’ll never forget the sinking feeling in my stomach when I saw the bathroom after packing up for a move. That stubborn mold around the bathtub and the grimy grout lines made me wonder if I’d just jeopardized my entire security deposit. It was a lightbulb moment—certain spots in a bathroom hide dirt and grime so well that landlords might use them as an excuse to withhold my refund. If you’re gearing up for your own move-out day, you probably share the same worry: how do you clean every tricky corner without turning it into a full-blown renovation? Today, I promise to uncover those sneaky, grimy bathroom spots that, if neglected, can seriously threaten your 2026 move-out refund. We’ll explore under-the-radar areas landlords scrutinize and share proven strategies to tackle them head-on. Did you know that according to a survey by Apartment Guide, over 60% of tenants lose part of their deposit due to overlooked cleaning? That made me realize early on I was making a critical mistake—not paying attention to those hidden spots—and I paid the price. Now, I want to help you avoid the same pitfalls. Let’s start with the big picture: knowing which areas most often trip up tenants and how to handle them efficiently so you can walk away with your full deposit and peace of mind. If you’re tired of seeing those dingy, overlooked spots sabotage your move-out plans, stick around. We’ll go through practical steps, backed by experts, to get every inch spotless, from the grout lines to behind fixtures. Ready to conquer those stubborn bathroom problems once and for all? Then let’s dive into the first of those sneaky spots that can make or break your refund—starting with the neglected corners behind the toilet.
Tackle Behind the Toilet First
Start by removing any objects around the toilet and applying a strong bathroom cleaner under the rim. Use a stiff-bristled brush to scrub the hidden corners, focusing on the junctions where mold and grime accumulate. I once spent an hour on this spot after noticing a slight discoloration; the difference was night and day afterward, preventing potential deposit deductions.
Use the Right Tools and Products
Equip yourself with a dedicated grout brush, disinfectant spray, and microfiber cloths. Opt for an enzyme-based cleaner for stubborn mold, as it breaks down organic matter without harsh chemicals. Remember, avoiding abrasive tools prevents damage to delicate surfaces, preserving the bathroom’s appearance and ensuring thorough sanitation.
Conquer Grout Lines and Caulk
Apply a specialized grout cleaner directly onto the lines and let it sit for 5 minutes. Scrub with a narrow brush to lift dirt and stains. For caulked areas, gently peel away old silicone and re-seal with fresh, mold-resistant caulk to seal out future grime and moisture. In my experience, replacing old caulk was the game-changer that kept mold at bay during subsequent inspections.
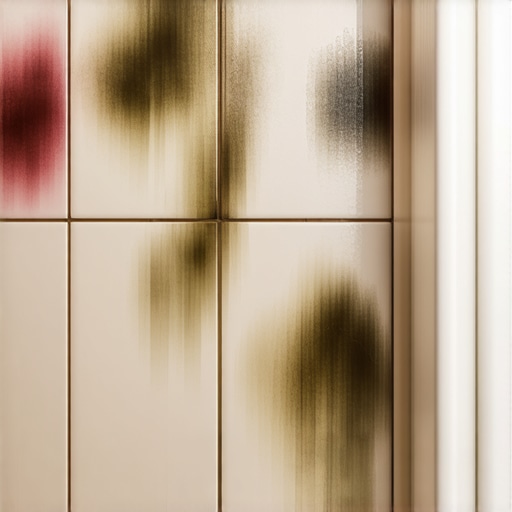
Deep Clean the Shower and Bathtub
Spray a bathroom-safe, mold-inhibiting cleaner on tiles and surfaces. Use a squeegee to remove excess water and prevent soap scum buildup. For textured surfaces, a steam cleaner can penetrate deep pores, making cleaning faster and more effective. This approach saved me hours during a move-out cleanup, ensuring every nook was sanitized.
Pay Attention to Hidden Corners
Check behind fixtures, under sinks, and inside drain covers. Use a flexible brush to reach tight spaces. Disassemble removable parts and soak them in a cleaning solution to loosen grime. I once discovered a forgotten pipe behind the vanity that was covered in residue, and cleaning it avoided a penalty from my landlord.
Sanitize and Finish
Finally, spray a sanitizing solution on all surfaces, ensuring bacteria and mold spores are eliminated. Wipe down with a clean microfiber cloth, paying special attention to high-touch areas like faucets and handles. This step not only guarantees a hygienic environment but also shows thoroughness that landlords appreciate.
For more comprehensive strategies on moving out cleaning, including hidden spots landlords scrutinize, visit this guide. Remember, a systematic approach to each area can make the difference between losing or reclaiming your deposit.
Many assume that thorough cleaning is just about tossing everything into the trash or scrubbing until surfaces shine. However, even seasoned homeowners often overlook critical nuances that can undermine their efforts. A common misconception is believing that using bleach or harsh chemicals guarantees sanitation, but in reality, these can damage surfaces or leave residues that trap bacteria rather than eliminate them. Advanced cleaning isn’t just about products—it’s about understanding the specific materials you’re working with and selecting the right methods for each.
Another trap many fall into is neglecting upholstery and fabric items during routine cleaning. Upholstery can harbor dust mites, pet dander, and allergens that standard vacuuming misses, which can compromise indoor air quality over time. Implementing specialist techniques, like dry-cleaning methods or low-moisture treatments, ensures longevity and trustworthiness of your furniture cleaning that most overlook. For detailed upholstery strategies, check out these expert tips.
When it comes to move-out cleaning, the typical mistake is focusing solely on visible dirt and neglecting hidden corners or less obvious spots. For example, many tenants forget to sanitize behind appliances or inside vents, which can lead to deposit deductions. The key lies in applying a systematic approach that tackles every nook and cranny, as outlined in comprehensive move-out cleaning strategies. Additionally, over-reliance on DIY methods without understanding surface compatibility can cause damage or ineffective sterilization.
Let’s take a deep dive into a crucial yet often misunderstood aspect: authentic sanitization. Many believe that disinfectants alone are enough for a safe and clean home. But, according to cleaning experts, proper sanitization involves a multi-step process that includes removing debris, choosing the correct disinfectant for the surface, and allowing adequate contact time. For instance, using an improper product on natural stone can cause etching or discoloration. This advanced nuance is discussed in detail at this resource.
The importance of understanding the microbial environment cannot be overstated. Recent studies suggest that surface cleaning alone isn’t sufficient; air sanitization and proper ventilation play vital roles in a truly healthy space. For example, ensuring that HVAC filters are regularly replaced and using HEPA air purifiers can drastically reduce airborne contaminants. Too many overlook this aspect, thinking cleaning is limited to visible surfaces. Integrating air quality improvements with traditional cleaning creates a holistic approach to hygiene, as supported by environmental health research.
Finally, an often underappreciated detail is the role of time in cleaning effectiveness. Using the correct cleanliness products is vital, but allowing disinfectants sufficient dwell time ensures they destroy microbes effectively. Rushing the process diminishes results and can lead to persistent contamination, especially in bathrooms and kitchens. For advanced strategies on optimizing your cleaning routine, visit this expert guide.
In conclusion, mastering house cleaning involves more than surface scrubbing. It requires understanding the nuances of materials, employing targeted techniques, and respecting the science behind sanitization. Have you ever fallen into this trap? Let me know in the comments.Achieving a spotless home isn’t just about the initial scrubbing; it’s about maintaining efficiency over time with the right tools and methods. Personally, I rely on a few specialized pieces of equipment that streamline the cleaning process and ensure lasting results. One staple in my arsenal is a high-quality steam cleaner. Unlike traditional mops, a steam cleaner penetrates deep into grout lines, upholstery, and sealed surfaces, killing bacteria without chemical residues. I use the Dupray Neat Steam Cleaner, which is portable, versatile, and eco-friendly, making it ideal for quick touch-ups or deep cleans.
How do I maintain my cleaning regimen over time?
Consistency is key. I recommend setting a weekly schedule that targets different areas, ensuring no spot gets neglected. Investing in durable microfiber cloths—not cheap disposables—helps maintain their effectiveness through multiple washes. These cloths trap dust and microbes better than standard materials, reducing the need for harsh chemicals. Additionally, replace vacuum filters and HVAC air filters regularly; this simple step significantly improves indoor air quality and prevents dirt buildup that can compromise your home’s hygiene. Staying organized with a cleaning checklist or digital reminder ensures you don’t miss critical tasks, such as sanitizing hidden corners or disinfecting high-touch surfaces, which are often overlooked but vital for hygiene.
Looking ahead, the trend in home cleaning points toward automation. Robotic vacuums equipped with smart mapping, like the iRobot Roomba s9, can maintain floors effortlessly, freeing you to focus on more detailed tasks during periodic deep cleans. Similarly, investing in smart sensors that monitor humidity and mold-prone areas can alert you to potential issues before they become costly repairs.
To keep your upholstery pristine long-term, I recommend periodic professional treatments with hot water extraction, especially for delicate fabrics. For everyday maintenance, a quick spritz with a fabric-safe disinfectant, followed by gentle brushing, prevents dust mites and allergens from settling in. Regularly scheduled upholstery refreshes extend the life of your furniture and support a healthier living environment.
Why a dedicated toolkit makes all the difference
Having specialized equipment designed for specific tasks ensures thorough cleaning without damaging surfaces. For example, using a soft-bristle grout brush instead of a wire brush preserves tile integrity while lifting stubborn stains. Employing gentle yet effective solutions, like enzymatic cleaners for organic grime, can make tough spots easier to handle—saving you time and money. If you’re interested in mastering these techniques, check out this comprehensive guide.
One advanced tip I strongly suggest trying is employing a vapor steam system for upholstery and delicate surfaces. The high-temperature steam can sanitize fabrics effectively, killing dust mites and bacteria, without the use of chemicals. According to technical research from the U.S. Environmental Protection Agency, steam sterilization provides a reliable, chemical-free method of infection control in home environments. Incorporating a vapor steam cleaner into your routine can transform your maintenance approach and prolong the cleanliness of your home.
Remember, the secret to lasting cleanliness is not just the initial effort but maintaining a disciplined routine with the right equipment. Embrace these tools and techniques consistently, and you’ll enjoy a healthier, more inviting living space for years to come.
Why I Nearly Lost It All Over a Tiny Corner
One lesson I learned the hard way was paying attention to the little details that make or break your move-out success. Overlooking the underside of the sink or behind the toilet may seem minor, but these hidden spots can haunt you at inspection time. My epiphany was realizing that a thorough clean involves more than just wiping surfaces—it demands a detective’s eye for the neglected corners that landlords scrutinize. Since adopting a meticulous approach, I’ve not only secured my deposits but gained confidence in my cleaning routine.
Tools and Tactics That Changed My Game
Investing in the right tools makes all the difference. Microfiber cloths, flexible brushes, and enzyme-based cleaners are my go-to arsenal. They target stubborn mold, soap scum, and grime without damaging delicate fixtures. For deeper surprises behind appliances or in drain covers, disassembling and soaking parts ensures no dirt remains hidden. These methods are backed by cleaning experts and have saved me from deposit deductions time after time.
Embracing a Systematic Approach
Creating a cleaning checklist that covers every inch—including behind and beneath fixtures—transformed my process. Regular inspections during the cleaning process prevent last-minute surprises. Using resources like comprehensive move-out cleaning strategies helped me develop a foolproof routine. Remember, consistency is key—twice as thorough cleaning now means fewer headaches during move-out inspections later.
Unexpected Lessons From the Depths
Discovering mold behind the toilet or grime inside drain covers was shocking, but it taught me the value of exploring the less obvious spots. Applying steam cleaning and replacing old caulk not only impresses landlords but keeps future issues at bay. These insights helped me realize that moving out is an opportunity to showcase your care and attention to detail, which landlords truly appreciate.
Final Spark of Confidence
Handling bathroom cleaning with care and precision isn’t just about securing your deposit—it’s about understanding the science of hygiene and investing in tools that deliver real results. When you’re equipped with knowledge and the right gear, move-out day feels less stressful and more empowering. Remember, every nook and cranny cleaned adds to your reputation as a responsible tenant who takes pride in their home. Ready to tackle those tricky spots with newfound confidence? Your full deposit is waiting on the other side.