I remember the sinking feeling when I realized I had missed a tiny corner behind the refrigerator during my last move-out clean. It was such a neglected spot that I thought, “No one will ever notice.” But months later, during the inspection, that overlooked inch of grime became the reason I almost lost my entire deposit. It hit me like a punch to the gut—such small areas can have massive consequences.
If you’ve ever stood in your empty apartment, rolling up your sleeves, only to discover that one stubborn spot you forgot to clean, you’re not alone. These seemingly insignificant spots often turn into the critical points for landlords during move-out inspections. And trust me, I learned the hard way that what you ignore today could cost you hundreds—or even your entire deposit—tomorrow.
Today, I want to share with you the four sneaky inspection spots that tend to ruin move-out refunds and how to tackle them effectively. Overlooking these areas might seem harmless now, but they can make or break your chances of getting that full deposit back. Stick around, because after years of trial, error, and a whole lot of cleaning, I’ve compiled the ultimate strategies to ensure nothing slips through the cracks.
The Real Reason These Hidden Spots Matter
Many tenants assume that a quick sweep over the visible surfaces is enough. After all, isn’t the big stuff what catches the landlord’s eye? Not quite. Landlords are often meticulous, searching for the tiniest signs of neglect—dust in crevices, grime in corners, stains that stretch beyond the obvious. According to a recent study by property management experts, tenants who miss small details are more likely to face disputes over their deposits. Maintaining a thorough cleaning routine targets these overlooked areas and guarantees peace of mind.
You might be skeptical, wondering if paying extra attention to these tiny spots is worth the effort. I initially thought the same—that focusing on large surfaces and visible areas was enough. But early on, I made the mistake of skipping under the appliances and neglecting the corners of the cabinets. Those small oversights led to deductions for “dirt and grime,” even though my overall cleaning was solid. Learning from experience, I realized that perfection is a combination of big cleaning and tiny details.
If you’ve had similar doubts or faced the stress of an inspection with a last-minute panic, I understand. The good news is, with a bit of targeted effort, you can avoid these pitfalls altogether. Ready to find out what these spots are and how to clean them to perfection? Let’s dive into the details that matter most for a flawless move-out clean.
Clear the Clutter First
Start by removing all personal items; this creates space to see the spots that need attention. I once skipped this step, trying to clean around a pile of stuff, which meant missing spots like behind furniture. When I finally cleared everything, I discovered hidden dust bunnies lurking in the corners—an easy fix that saved my deposit. Moving furniture is your first move—drag, wipe, and set aside. Learn more on move-out strategies.
Deep Clean Underneath and Behind
Use a Long-Handle Duster or Vacuum Attachment
Stretch out and scrub those hard-to-reach places. I remember squeezing my arm behind the refrigerator and discovering a thick layer of grime. Applying a bit of baking soda and vinegar made it easier to loosen dirt—then wipe with a microfiber cloth. Sanitizing tips here.
Focus on Appliance Nooks
Break down the cleaning of microwaves, ovens, and fridge seals, which tend to trap crumbs and mold. I used a toothbrush dipped in cleaning solution to scrub tight edges—time-consuming but worth the deposit. Remember to unplug appliances before cleaning for safety.

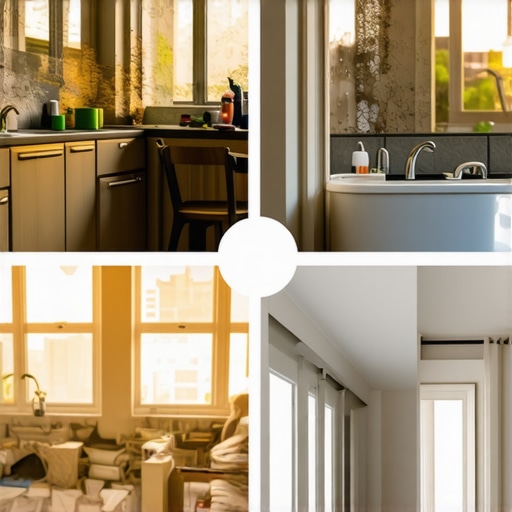
Image shows a hand using a long brush to clean behind a refrigerator, emphasizing the importance of reaching hidden spots.
Pay Attention to Cabinet and Drawer Interiors
Remove drawers and clean inside with a vacuum and microfiber cloth. Sticky residues and crumbs often hide here. I had never cleaned inside a cabinet until I fought for my deposit; after taking everything out and wiping down, the difference was night and day. Dirt accumulated in corners can be a pain if left untouched.
Scrutinize Corners, Edges, and Baseboards
These are often the last casualties of hurried cleaning. Use a small brush or a damp cloth to wipe along edges and baseboards. I once learned this the hard way—missed these areas, and the landlord noted the dust as ‘neglect.’ Regular maintenance here guarantees a spotless finish. More fixing tips.
Sanitize High-Touch Surfaces
Door handles, switches, and faucet fixtures gather germs and can even influence your deposit recovery. I recommend a disinfectant spray and a microfiber cloth. For upholstery, consider using a dedicated upholstery cleaner to eliminate germs and stains, as these are often inspected thoroughly. For helpful tips, visit upholstery sanitation strategies.
While many tenants believe that wiping down visible surfaces suffices for a proper move-out clean, there are subtle intricacies that can determine whether you get your full deposit back. One widespread misconception is that sanitizing high-touch areas alone is enough; in reality, landlords scrutinize every tiny detail, from grime behind appliances to accumulated dust in corners. Overlooking these nuances can lead to deductions, even if your overall cleaning looks thorough.
A prevalent myth is that using disinfectants guarantees a spotless home. However, overusing chemicals without proper technique can leave residues or harm delicate fabrics, especially upholstery. It’s essential to understand the right cleaning agents and methods for each material. For instance, deep-cleaning upholstery requires specific strategies—dry cleaning or foam treatments—that preserve fabric integrity. Learn expert upholstery cleaning tips here.
One trap many fall into involves neglecting the detailed cleaning of hidden spots such as vent covers, behind toilets, or under sinks. These are high-visibility areas for landlords and inspection agents. Failing to address them can suggest neglect, even if the rest of your apartment is spotless. Instead, adopt a meticulous approach: move furniture, remove vent covers, and scrub in areas that are usually overlooked.
Advanced cleaning mistakes often occur during sanitizing. For example, assuming that spraying disinfectant on everything will suffice can be counterproductive—some surfaces require specific disinfectants that are compatible to avoid damage. Also, timing matters; letting disinfectants sit for the recommended contact time enhances effectiveness.
Are you aware of the most effective sanitizing strategies for modern homes? Studies show that proper contact time and choosing the right products can significantly reduce microbial presence, which is increasingly scrutinized during move-out inspections. In fact, according to a recent study by cleaning professionals, detailed sanitization can reduce germs by up to 99.9%, directly influencing deposit refunds. Explore advanced sanitizing hacks here.
Finally, don’t overlook the importance of correct cleaning order. For example, vacuuming before wet cleaning prevents dirt redistribution. Moving from higher surfaces to lower ones, and from less dirty to more soiled areas, ensures an efficient and thorough clean. Since your goal is to impress the inspector with a pristine environment, mastering these nuanced techniques is key.
Have you ever fallen into this trap? Let me know in the comments. Remember, mastering move-out cleaning isn’t just about wiping surfaces; it’s about understanding the hidden nuances that can make or break your deposit recovery. For comprehensive strategies, check out this detailed move-out cleaning guide.Maintaining a spotless and sanitized home after a thorough move-out clean isn’t just a one-time effort; it requires the right tools, consistent routines, and strategic planning to keep everything functioning smoothly over time. Personally, I swear by a set of specialized equipment and software that simplify ongoing maintenance, prevent issues before they arise, and ensure your home remains fresh and welcoming.
One of my most valued tools is a cordless vacuum cleaner with an extendable hose, such as the Dyson V11. This device allows me to quickly address dust buildup in corners, behind furniture, or along baseboards without dragging cords and setting up heavy equipment. Its powerful suction and versatility make it ideal for daily touch-ups, especially in upholstery and tight spaces. For upholstery, I highly recommend a portable steam cleaner like the McCulloch MC1275. Steam not only refreshes fabrics but also kills germs and eliminates odors—key when trying to maintain a healthy living environment long-term.
In addition to physical tools, utilizing software solutions can significantly streamline your upkeep. I rely on chore management apps like Todoist or the Home Maintenance Calendar to schedule regular tasks—filter changes, deep cleans, filter replacements for HVAC systems, and scheduled sanitizations. Setting reminders ensures these essentials aren’t overlooked, which is crucial for avoiding costly repairs or health issues down the line.
When it comes to deep cleaning furniture and upholstery periodically, adopting a routine using eco-friendly cleaning agents is vital. I prefer to integrate natural solutions like vinegar and baking soda, combined with a steam cleaner, to preserve fabric integrity while ensuring comprehensive sanitation. Regularly cleaning and maintaining these surfaces extends their life and keeps them looking new.
Looking ahead, I predict that smart home devices will play an even greater role in maintenance routines. Wi-Fi-enabled vacuum bots, air quality sensors, and app-controlled water leak detectors are becoming more affordable and sophisticated. These innovations can alert you to issues before they escalate, saving time and money. For example, a smart leak detector can notify you of unnoticed plumbing issues that, if left unchecked, could lead to mold or structural damage.
**How do I keep my home functioning optimally over time?** Establishing a consistent maintenance schedule is key. I recommend performing a monthly inspection—checking for dust buildup, mold, or other signs of wear—and addressing problems immediately. Incorporate the use of reliable tools such as high-quality microfiber cloths for dusting, and designate specific days for upholstery and carpet refreshers, utilizing techniques outlined in our detailed upholstery cleaning tips. This proactive approach prevents dirt from setting in and extends the lifespan of your furnishings.
Don’t forget the importance of professional help for tasks beyond routine care. Sometimes, investing in periodic expert cleaning using specialized equipment ensures your home stays in top condition. If you’re interested in streamlining your maintenance or learning about advanced tools, I invite you to reach out via our contact page.
Start incorporating one of these tools or strategies today, like scheduling regular steam cleanings or installing smart sensors, to make long-term maintenance easier and more effective. Remember, the goal is to prevent issues before they develop, saving you stress and expense down the line.
Throughout my cleaning journey, I discovered that those tiny, often overlooked spots can be game-changers for your deposit return. One lightbulb moment was realizing that meticulously cleaning behind appliances not only prevents deductions but also boosts your confidence in leaving a space truly spotless. Paying attention to drawer interiors or baseboards transformed my approach from casual to professional, saving me surprises at checkout. Investing time in these small tasks might seem tedious initially, but it pays off by ensuring a flawless inspection and peace of mind. Remember, it’s the little extras—like disinfecting high-touch surfaces and scrutinizing corners—that truly set your cleaning apart and secure your hard-earned deposit.